7-Pin Plug Not Charging the Trailer Battery
The Pin-by-Pin Test

Truck-to-battery charge path
- Truck fuse and relay Ignition-switched Empty socket, blown fuse
- Socket pin, 1 o'clock 13-14 V running No power, corrosion
- Plug and cord Spread blades, water
- Tongue junction box Loose splice
- Breaker or fuse Often 30 A Tripped, corroded
- Battery posts 13.0-13.4 V Disconnect off, drop
Not sure where to start?
Answer one check at a time, in the order the system works. The first "no" is where the fault is, and you jump straight to the step that fixes it.
Tap a pin on the truck socket
1 o'clock
12 V charge / aux
Usual wire: Black (sometimes red)
Test: Engine running. Expect 13.0 to 14.4 V. 0 V with the key off is the relay doing its job.
3 o'clock
Right turn and stop
Usual wire: Brown (sometimes green)
Test: Right signal on: reading pulses 0 to battery voltage. Brake pedal: steady.
5 o'clock
Electric brakes
Usual wire: Blue
Test: Squeeze the controller lever. An LED tester reads clearer than a meter; no reading with no trailer attached is normal on many controllers.
7 o'clock
Ground
Usual wire: White
Test: Black probe goes here for every other test. Flickering lights or several functions failing together point at this pin.
9 o'clock
Left turn and stop
Usual wire: Red (sometimes yellow)
Test: Left signal on: reading pulses 0 to battery voltage. Brake pedal: steady.
11 o'clock
Tail / running lights
Usual wire: Green (sometimes brown)
Test: Headlights on. Expect battery voltage, 12.4 V or more.
Center pin
Reverse lights or aux
Usual wire: Yellow (sometimes purple)
Test: Engine running, in reverse with a helper on the brake. Expect battery voltage. Many trucks leave it unwired.
Watch it done
Videos are from the channels named, not Chock & Level. Where a video and your manual disagree, follow the manual. Playing a video loads YouTube, which sets its own cookies.
You towed all day and the trailer battery is no fuller than when you left. Or the battery monitor shows no charging at all while the truck runs. Working brakes and lights don’t prove the charge circuit works. The 7-pin connector carries seven separate circuits, and the 12 V charge circuit is the one most often missing or broken. In order of likelihood: the truck never powered that pin from the factory (no fuse, no relay installed), a blown fuse or tripped breaker on either end, corrosion in the socket or plug, a loose connection in the trailer’s junction box, a battery disconnect switch in the off position, and finally a charge line that works exactly as designed and just can’t deliver much current.
You need a multimeter, ideally a plug-in 7-way tester, and a helper for the lights and brakes. Plan on 20 minutes for the truck side and another 20 for the trailer side.
Quick answer. With the engine running, measure between the 1 o'clock pin (12 V aux) and the 7 o'clock pin (ground) on the truck socket. You want roughly 13 to 14.4 V. Zero volts means the truck isn't powering the circuit: check the owner's manual fuse table for a trailer battery charge fuse and relay, and expect to install a fuse or relay that came out of the factory empty. Voltage at the socket but not at the trailer battery means a breaker, junction box splice, or the battery disconnect. Even when everything works, expect a few amps, not a full charge. A DC-DC charger is the real fix if you need to charge while driving.
The 7-way RV blade layout
The flat-blade 7-way used on nearly all US pickups and travel trailers is standardized in SAE J2863. Looking into the face of the truck’s socket with the keyway at the top:
| Position | Function | Common wire color |
|---|---|---|
| 1 o’clock | 12 V auxiliary / battery charge | Black (sometimes red) |
| 3 o’clock | Right turn and stop | Brown (sometimes green) |
| 5 o’clock | Electric brakes | Blue |
| 7 o’clock | Ground | White |
| 9 o’clock | Left turn and stop | Red (sometimes yellow) |
| 11 o’clock | Tail / running lights | Green (sometimes brown) |
| Center | Reverse lights or auxiliary | Yellow (sometimes purple) |
The trailer plug is the mirror image when you look at its face, so don’t use this table on the plug without flipping it. Wire colors vary by manufacturer and model year; trust function over color. The round-pin 7-way (SAE J560) used on commercial trailers is wired differently. Don’t mix the two diagrams.
How the charge line is supposed to work
The 12 V pin is fed from the truck’s battery through a fuse and, on most trucks, a relay switched by the ignition. The relay keeps the trailer from draining the truck battery when the engine is off. From the socket, current runs through the trailer’s 7-way cord to a junction box on the tongue, through an inline fuse or auto-reset breaker, and to the trailer battery positive. Ground returns through the white wire to the truck.
There’s no charger in this path. The trailer battery simply sits in parallel with the truck’s electrical system. Whatever voltage reaches the trailer battery, minus the wiring losses, is the charge voltage. That fact explains most of what follows.
Step 1Test every pin on the truck socket
Start at the truck with the trailer unplugged. Black meter probe on the 7 o’clock ground pin (or a clean spot on the truck frame), red probe on each pin in turn. A plug-in LED tester is faster for the lighting pins; the meter is better for the charge pin because it gives you a number.
- Tail lights (11 o’clock). Turn on the headlights. Expect battery voltage, 12.4 V or more.
- Left turn (9 o’clock) and right turn (3 o’clock). Turn signal on each side; the reading should pulse between 0 and battery voltage. Press the brake pedal; both should read steady.
- Electric brakes (5 o’clock). Squeeze the brake controller’s manual lever. Electronic controllers pulse their output and many show odd readings or nothing without a load. An LED tester or a test light gives a clearer answer; a controller that shows “no connection” or “n.c.” with no trailer attached is normal.
- Reverse (center). Engine running, parking brake set, shift to reverse with a helper’s foot on the brake. Expect battery voltage. Many trucks leave this pin unwired.
- 12 V charge (1 o’clock). Engine running. Expect roughly 13.0 to 14.4 V, the same as across the truck battery. Smart-charging alternators on many newer trucks may show 12.8 to 13.2 V at times; that’s the truck, not a fault.
If the charge pin reads 0 V with the engine running, go to step 2. If it reads normal with the engine running but 0 V with the key off, that’s the relay doing its job.
Step 2Find the truck’s trailer charge fuse and relay
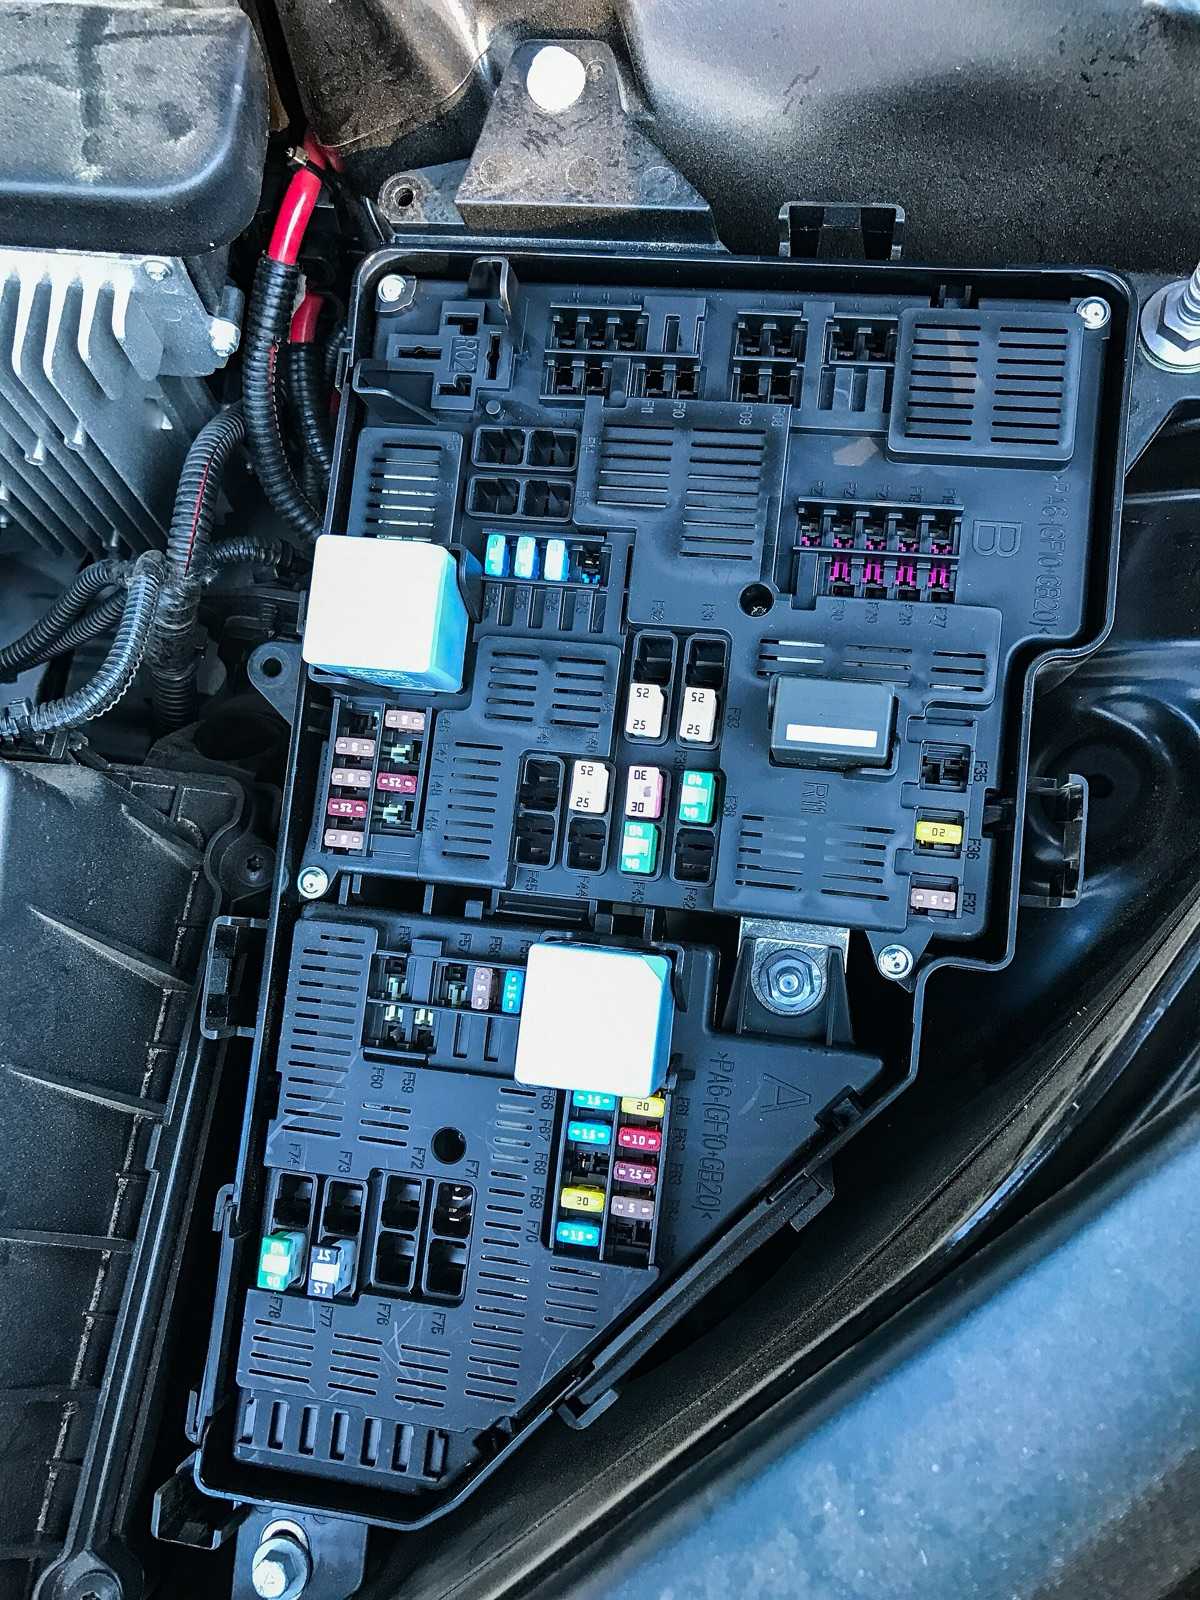
This is the most common cause on trucks with factory tow packages. The socket is wired, but the fuse, the relay, or both are left out of the underhood box at the factory, or installed only with certain packages.
Open the owner’s manual to the fuse tables and look for the circuit by name.
- Ford (F-150, Super Duty): look for “trailer tow battery charge” in the underhood box; it typically uses both a fuse and a relay. Several model years ship with one or both sockets empty.
- GM (Silverado, Sierra): trailer circuits carry a “TRLR” prefix in the underhood fuse table; find the one for trailer battery.
- Ram: look for a trailer tow or trailer battery charge entry in the power distribution center; some years need a relay added.
Compare the fuse and relay sockets to the table. An empty socket where the table lists a fuse or relay is your answer: install the specified amperage fuse and the matching relay part number from the manual or a dealer. A fuse that blows again right away means a short in the truck harness or the trailer; stop and find it before going larger.
On aftermarket or dealer-installed hitch wiring, the 12 V pin often wasn’t connected at all. You’ll find the black wire coiled behind the socket. Running a fused, relayed feed from the battery is a reasonable project, but it’s real wiring; follow the hitch wiring kit’s instructions.
Step 3Inspect the socket, the plug, and the cover
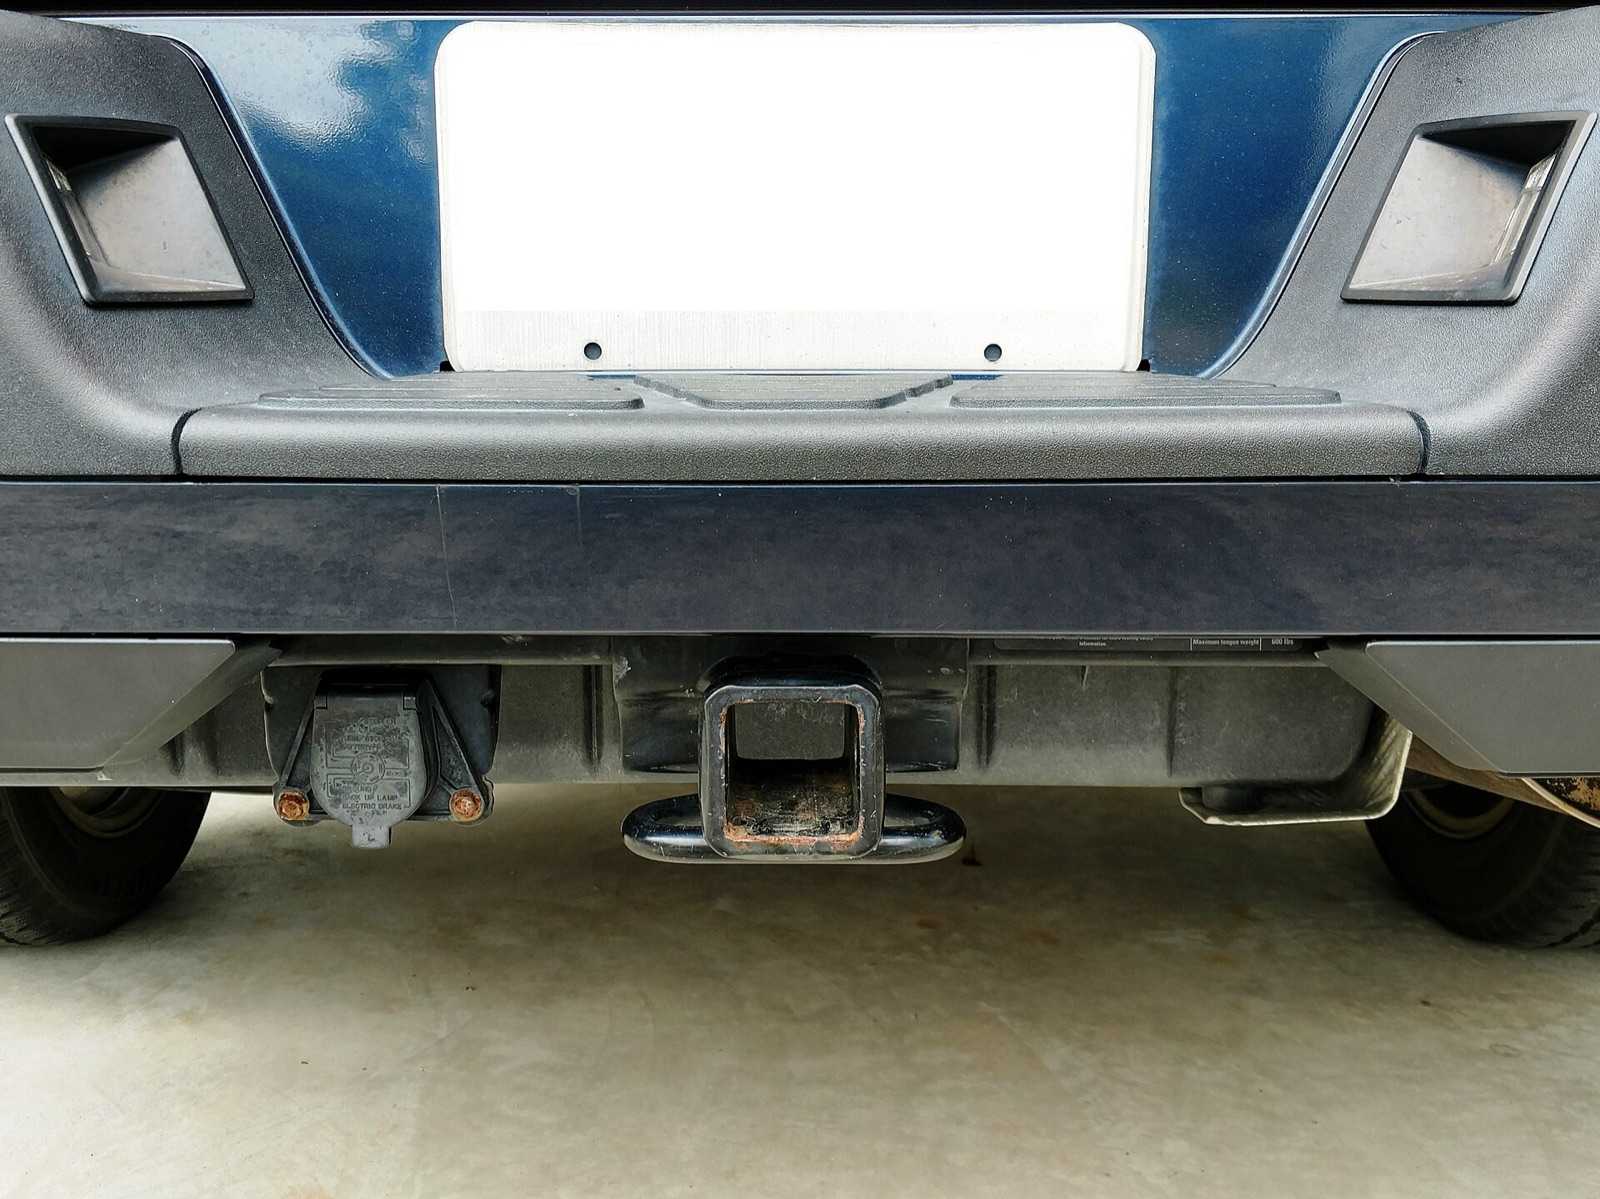
Water gets into a truck socket every time the spring-loaded lid doesn’t close fully: a weak spring, a cracked lid, or a plug hanging on the bumper. The trailer plug, dangling unprotected in storage, collects water and dirt too.
Look at the brass contacts in both. Green or white crust, or pins that look dull and pitted, add resistance that the charge circuit can’t afford. Also check that the trailer plug’s female contacts grip; spread contacts make intermittent connections.
Clean both sides with contact cleaner and a small brush or pick until the metal is bright. Gently pinch spread contacts closed. Then apply a thin film of dielectric grease to the contacts and seal. It keeps water out; the contact pressure pushes it aside where the metal meets.
Replace a broken socket lid, and use a plug holder on the trailer tongue so the plug is protected when not connected.
Step 4Trace the trailer side
Plug the trailer in, start the truck, and measure at the trailer battery posts. Then compare to what you measured at the truck’s charge pin.
- Battery voltage only (12.x V), no rise with the engine running: something between the plug and battery is open.
- A rise of a few tenths, up to about 13.0 to 13.4 V: the line works. Step 5 explains why it’s not more.
Battery disconnect switch. If the trailer has a disconnect, it must be on, or the charge line is isolated from the battery along with everything else. Check this first.
Junction box. Most travel trailers have a junction box on the tongue where the 7-way cord meets the trailer wiring. Open it. The charge (black) wire, the brake (blue) wire, the breakaway switch wires, and ground all meet here. Look for a loose screw terminal, a corroded butt splice, or a wire that has pulled out.
Inline fuse or auto-reset breaker. Between the junction box and the battery there’s usually a 30 A fuse or a thermal auto-reset breaker, often near the battery. Measure across the device’s two terminals with the truck running and the trailer connected. More than a few tenths of a volt across it means it’s tripped or corroded. Replace with the same rating.
Breakaway switch wiring. The breakaway switch connects the trailer battery directly to the brake magnets if the trailer separates from the truck. It’s wired between the battery positive and the blue brake wire, and on many trailers it shares the junction box and the battery feed with the charge line. When you’re working in the junction box, keep the charge wire and the breakaway wires where they belong. Never connect the charge line or anything else in a way that disables the breakaway switch or puts 12 V on the brake circuit.
Step 5Why a working charge line still won’t fill the battery
Here’s the physics. The wire is long and the voltage difference is small.
Worked example (assumptions stated). A typical setup: 12 AWG charge wire, about 25 ft from truck battery to rear socket, plus about 10 ft from the trailer plug to the trailer battery, so 35 ft each way. Ground returns over a similar length. Copper 12 AWG is about 1.6 Ω per 1,000 ft (NEC Chapter 9, Table 8).
- Round-trip wire: 70 ft × 0.0016 Ω/ft = 0.11 Ω
- Add connector contacts, breaker, and splices, conservatively 0.03 to 0.05 Ω: about 0.15 Ω total
- Truck alternator holding the truck battery at 14.0 V
- Trailer battery about half charged; under charging current its terminal voltage quickly rises to around 13.2 V
Current = (14.0 V - 13.2 V) ÷ 0.15 Ω = about 5 A.
As the trailer battery charges, its voltage rises toward 13.6 V and the current drops to 2 to 3 A. A lead-acid battery needs about 14.4 V to fully charge, and the charge line can’t ever exceed what the truck’s system provides, minus losses. With 10 AWG wire, about 1.0 Ω per 1,000 ft, the same run is about 0.11 Ω total and the current improves to roughly 7 A, but the ceiling is the same.
So a three-hour drive puts back roughly 10 to 20 Ah into a half-empty battery and leaves it somewhere around 70 to 80 percent. That’s not a fault. On trucks with smart alternators that drop to 13 V or below when the truck battery is full, the charge can drop close to zero.
Step 6When a DC-DC charger is the answer
A DC-DC charger mounted near the trailer battery takes whatever voltage arrives on the charge line, boosts it, and delivers a proper multi-stage charge at a fixed current. Units like the Victron Orion-Tr Smart 12/12-18 or 12/12-30 and Renogy 20 A or 40 A DC-DC chargers are common. They’ll fully charge lead-acid or lithium and include settings for smart alternators. For a lithium battery, a DC-DC charger is close to essential if you need to charge while towing.
The catch: a DC-DC charger draws more current from the truck than it delivers to the battery to make up for the boost. A 20 A output unit can pull 25 A or more on the input. That means the truck’s charge circuit fuse, the 7-pin contacts, and the wire all need to handle it. For 30 A and up, most installers run a dedicated heavier cable from the truck battery to a separate connector (an Anderson-style plug) rather than relying on the 7-pin. Read the charger manual for wire size and fusing.
Symptom → likely cause
| What you see | Most likely | Check |
|---|---|---|
| 0 V on the 1 o’clock pin, engine running | Missing fuse or relay in the truck | Owner’s manual fuse table, empty sockets |
| Voltage at the pin with key off too | Unrelayed feed; will drain the truck battery | Wiring kit, relay |
| Voltage at socket, none at trailer battery | Disconnect, breaker, junction box | Switch position; voltage across breaker |
| Charge works but battery never gets full | Normal voltage drop limit | Worked example above; DC-DC charger |
| Charge cuts in and out over bumps | Spread or corroded contacts | Clean, pinch, grease |
| Lights flicker or several functions act up together | Bad ground pin or ground wire | 7 o’clock pin, white wire, frame ground |
| Brakes drag after hookup | Breakaway pin partly out, or miswired junction box | Breakaway pin seated; junction wiring |
| Truck battery dead after parking hooked up | Charge pin not switched by ignition | Relay, unplug when parked |
Stop and fix it before towing if: the brakes, brake lights, turn signals, or tail lights don't test correctly. Those are safety circuits; check all of them with a helper or an LED tester before every tow, not only when the battery is low. Never bypass, unplug, or rewire the breakaway switch to troubleshoot or to stop the brakes dragging. It is the only thing that stops a trailer that has come off the hitch, and many states require it along with a breakaway battery that holds the brakes on for 15 minutes. If a fuse in the truck blows again after replacement, or the plug or socket shows heat discoloration or melted plastic, have the wiring checked by a tech before the next trip.
Parts and tools mentioned
- Digital multimeter
- Plug-in 7-way LED tester, or a 12 V test light
- Fuse and relay specified in your truck’s owner’s manual for the trailer charge circuit
- Replacement 30 A inline fuse or auto-reset breaker, matched to the original
- Contact cleaner, small wire brush or pick, dielectric grease
- Replacement 7-way socket lid or socket; trailer plug holder
- DC-DC charger: Victron Orion-Tr Smart 12/12-18 or 12/12-30, Renogy 20 A or 40 A
Questions people ask next
Will towing charge my trailer battery from empty? Partly. Expect a few amps for most of the drive. A long day might bring a half-empty battery to around 80 percent; a short trip barely moves it.
Can I just use bigger wire? Bigger wire on the trailer side helps a little, but the truck wiring to the socket and the 7-pin contacts limit you too. A DC-DC charger fixes the voltage problem; bigger wire alone doesn’t.
Does my truck’s charge pin need the engine running? On most trucks, yes. The relay switches with the ignition so the trailer can’t drain the truck battery while parked.
My lights work but nothing charges. Is the plug bad? The lighting circuits are separate. The charge circuit has its own fuse, relay, and pin, so lights working proves nothing about charging. Test the 1 o’clock pin.
Photos


Manuals and references consulted
- SAE J2863 Automotive Adapter Harness Connector Interface (7-way blade layout and functions)
- Ford Super Duty and F-150 owner's manuals, fuse and relay tables (trailer tow battery charge fuse and relay)
- GM Silverado/Sierra owner's manuals, underhood fuse block tables (TRLR-labeled circuits)
- Ram 1500/2500 owner's manuals, power distribution center tables (trailer tow circuits)
- NEC Chapter 9, Table 8 (copper conductor resistance, ohms per 1,000 ft)
- Victron Energy Orion-Tr Smart DC-DC charger manual