Weight-Distribution Hitch Setup
The Measurement Sequence, With the Numbers to Write Down
Weight-distribution setup sequence
- Measure unhitched fenders Level ground, loaded Uneven ground skews all
- Set ball height Above level coupler Trailer nose high/low
- Hitch, bars off Record front rise Tongue weight unknown
- Bars on, tensioned Washers, links, nuts Wrong bar rating
- Compare to target Per truck manual Front below unhitched
- Torque, re-check 50 mi Ball nut per manual Hardware settled, loose
Tongue weight & payload calculator
Plug in your scale numbers and the door sticker; get the 10–15% window and the payload you have left.
Open the calculator →Watch it done
Videos are from the channels named, not Chock & Level. Where a video and your manual disagree, follow the manual. Playing a video loads YouTube, which sets its own cookies.
The truck squats, the headlights aim at the treetops, and the steering goes vague over bumps. Or you just bought a weight-distribution hitch, the box is on the garage floor, and the instructions assume you already know what “restore front fender height” means.
Setting one up is a measurement job. Tension the bars by feel and you either leave the front axle unloaded or over-tension and load the hitch and A-frame past what they’re built for. The Equal-i-zer, Blue Ox, Andersen, and Reese/Husky manuals all describe the same sequence in different words: measure the truck unhitched, hitched without bars, and hitched with bars, then adjust until the front comes back where your truck’s manual says.
You need a tape measure, a torque wrench that reaches the ball-nut spec, a level, chocks, and a level driveway or parking lot. Budget two hours the first time. You also need to know your loaded tongue weight; if you don’t, measure it first using the tongue weight guide.
Quick answer. On level ground, measure the truck's front and rear fender heights unhitched, then hitched with no bars, then hitched with bars tensioned. The target is for the front fender to come back part of the way to its unhitched height: many current Ford, GM, and Ram manuals say restore about 50 percent of the drop, older guidance and some hitch manuals say nearly all of it. Use your truck manual's number. Adjust with head tilt washers or chain links, torque everything to the hitch manual's spec, and re-measure after 50 miles.
What a weight-distribution hitch actually does
Hang 800 lb on a ball 4 or 5 ft behind the rear axle and the truck pivots on that axle: the rear drops, the front lifts. On a 145 in wheelbase with a 55 in overhang, that’s roughly 1,100 lb added to the rear axle and 300 lb taken off the front. Less front load means less steering grip and less front braking.
The spring bars fix the rotation. Each bar is a lever: one end is clamped in the hitch head, the other is pulled up toward the trailer frame by a chain or bracket. Bending the bars pushes the back of the truck up and the trailer tongue down, which moves some of the ball load forward to the truck’s front axle and back to the trailer’s axles. With the bars tensioned correctly, the truck sits closer to level, the front tires carry close to their normal load, and the trailer frame runs level.
What it does not do: raise payload. The full tongue weight still counts against the yellow door-jamb label, and the hitch adds 80 to 100 lb on top; that math is in the payload guide. It does unlock the higher “weight distributing” line on the receiver sticker, which applies only with bars installed and tensioned.
Before you start: tongue weight, bar size, and the receiver sticker
Spring bars are sold by tongue weight range, and the right bar is the one whose range contains your loaded tongue weight plus any cargo in the truck bed behind the rear axle. That second part comes straight from the Equal-i-zer manual and it surprises people: a generator and two coolers in the bed load the rear axle the same way the tongue does, and the bars have to lift that too.
Typical bar ratings run in steps of 600, 800, 1,000, 1,200, and 1,400 lb of tongue weight, with exact steps varying by brand. How tension is adjusted also varies:
| Hitch | Tension adjusted by |
|---|---|
| Equal-i-zer 4-Point | Head tilt washers; L-bracket height on the frame |
| Blue Ox SwayPro | Chain links at the rotating latches |
| Reese / Husky round bar | Chain links at the lift brackets; head tilt washers |
| Andersen No-Sway | Threaded chain nuts |
Confirm the rating stamped on your bars against your measured number.
Bars too stiff for the load can’t flex enough: the ride gets harsh, the trailer frame takes a beating on expansion joints, and each adjustment step is too big. Bars too light run out of lift before the front axle is restored, and the hitch sags no matter how you adjust it.
Read the receiver sticker before you buy anything. A typical half-ton sticker reads “Weight Carrying: 600 lb TW / 6,000 lb GTW” and “Weight Distributing: 1,200 lb TW / 12,000 lb GTW” or similar. If the WD line is below your tongue weight, the bars don’t fix that. Also check the truck manual’s towing section: some SUVs prohibit weight distribution outright, and most trucks specify how much front axle load to restore.
Step 1Level ground, truck unhitched, two fender heights
Park the truck on a flat, level surface, loaded the way you tow: fuel, people or their equivalent weight, and whatever rides in the bed. Mark the spot, because you’ll be back on it.
Measure from the ground to the fender lip, centered over the axle, front and rear, same side of the truck every time. Write both down to the nearest 1/8 in. These are your reference heights.
Then chock both trailer wheels on both sides, put a level on the frame rail, and run the tongue jack until the trailer is level. Measure ground to top of coupler. This is your level coupler height.
Step 2Set the ball height and the starting head tilt
The ball should start higher than the level coupler height, because the truck’s rear drops when the tongue lands on it. Each hitch manual gives a starting offset, commonly in the range of 1/2 to 1-1/2 in above the coupler depending on tongue weight; use the figure in yours. Set it by moving the head on the shank, or flipping the shank for rise or drop, and snug the head bolts for now.
Head tilt is the second adjustment. Tilting the head back toward the trailer pre-loads the bars and raises tension. On an Equal-i-zer and on most Reese and Husky round-bar heads, tilt is set with spacer washers; more washers, more tilt. Blue Ox and Andersen do most of their fine tuning at the chain end instead. Start with the setting the manual gives for your tongue weight and expect to change it.
Step 3Hitch without the bars, measure again
Back the ball under the coupler, lower the coupler onto the ball, latch it, and raise the tongue jack until it clears the ground. Do not attach the bars yet. Measure both fenders at the same spots you marked. The front will be higher than your reference and the rear lower.
This front measurement minus the reference is your front rise. Write it down. A half-ton with 800 lb on the ball typically rises somewhere around an inch at the front and drops 2 to 3 in at the rear; your numbers will differ.
Step 4Attach the bars, tension them, measure a third time
With the trailer still hitched, run the tongue jack up until it lifts the truck’s rear 2 to 3 in. The chain or bracket then goes on with hand force instead of a fight.
Equal-i-zer: seat each bar in the head socket and set it onto the L-bracket on the trailer frame. Reese/Husky: hook the chain on the lift bracket, count the hanging links, and snap the bracket up with the lever; the manual gives a minimum link count, so don’t shorten past it. Blue Ox: hook the chain to the rotating latch and rotate it closed with the handle. Andersen: run the chain nuts up until they contact the bushings, then add the turns the manual specifies.
Lower the tongue jack all the way, so the full weight is on the hitch. Measure both fenders a third time.
Step 5Compare against the target, then adjust
Now you have three front heights: unhitched (A), hitched no bars (B), hitched with bars (C). The question is how far C has come back from B toward A.
Your truck’s manual decides. Many late-model truck manuals say to restore about 50 percent of the front-end change, so C lands about halfway between B and A. Older hitch instructions aimed for nearly full restoration, close to A. The range across manufacturers is roughly 50 to 100 percent; follow the truck maker, because they know what the frame and rear axle were tested with. The rule everyone agrees on: never push the front lower than A. That means the bars are over-tensioned, the rear axle is being unloaded, and the hitch and A-frame are seeing more force than they were designed for.
If C is above target, add tension: one more tilt washer, one chain link shorter, the L-bracket up a hole, or more turns on the Andersen nuts. If C is below target, back off the same way. One washer or one link is a coarse step, so re-measure after every change, and jack the coupler up to unload the bars each time.
Then check the trailer frame with the level. It should be level or very slightly nose down. Nose high means the ball is too high. Fix that with the shank position, not bar tension, then re-check the fenders.
Step 6Torque it, drive 50 miles, measure and torque again
Once the numbers are right, torque the hardware to the hitch manual’s values. The big ones are the head-to-shank bolts and the ball nut. Ball nut torque on a 2-5/16 in ball is commonly 250 ft-lb or more, and higher for larger shanks; use the number printed in your hitch or ball instructions. That’s beyond most 1/2 in drive torque wrenches, so plan on a 3/4 in drive wrench or a torque multiplier. Torque the frame bracket bolts to spec too, and fit the shank pin and clip.
After the first 50 miles, return to your marked spot, hitch exactly as before, and re-measure. New hardware settles and bolts seat. Re-torque everything at the same time, and re-check whenever the load changes: a full fresh tank, a generator in the bed, a different truck.
Friction sway control vs integrated sway control
A basic round-bar Reese or Husky hitch distributes weight but does nothing about sway by itself. Sway control comes from an add-on friction bar, a telescoping arm clamped between a small ball on the hitch head and one on the A-frame. Two bars are commonly recommended on larger trailers. Friction bars have rules in their instructions: back off or disconnect for sharp backing, and don’t use them on slick, wet, or icy roads, where resisting the trailer’s movement can make a skid worse.
Equal-i-zer, Blue Ox SwayPro, Andersen, and Reese’s Dual Cam build sway resistance into the weight-distribution hardware: friction at the bar sockets and brackets on the Equal-i-zer (that’s the groaning in turns), spring load through the latches on the SwayPro, tensioned bushings on the Andersen. None of them replaces correct tongue weight. If the trailer sways with the hitch set up right, go back to the tongue weight guide; sway control manages a balance problem, it does not cure one.
The table to fill in
Copy this to a notepad and keep it in the truck. The first line is your reference; everything else is compared to it.
| Measurement | Front fender (in) | Rear fender (in) | Coupler / ball (in) | Notes |
|---|---|---|---|---|
| Truck unhitched, loaded for travel (A) | Level coupler height: | Date, load in bed | ||
| Hitched, bars off (B) | Front rise = A − B | |||
| Hitched, bars tensioned (C) | Target per truck manual | |||
| Head tilt washers / chain links / nut turns | ||||
| Trailer frame: level, nose up, nose down | ||||
| Ball nut torque (ft-lb, from manual) | ||||
| Head/shank bolt torque (ft-lb) | ||||
| Re-measured at 50 miles (C again) | Re-torqued? |
Symptom → likely cause
| What you see | Most likely | Check |
|---|---|---|
| Rear squats, front sits high, steering light | Bars under-tensioned or too light | Compare C to target; bar rating vs tongue weight |
| Truck front lower hitched than unhitched | Bars over-tensioned | Remove a washer or add a link until C is at target |
| Trailer nose high with bars on | Ball too high | Lower the head on the shank, re-measure |
| Harsh, jolting ride over expansion joints | Bars too stiff for the load | Bar rating vs actual tongue weight |
| Bars bottomed out, can’t get enough tension | Bars too light, or tongue weight higher than you think | Re-weigh tongue; bar rating |
| Loud groaning in turns on an Equal-i-zer | Normal friction sway control | Manual’s lubrication guidance for the brackets |
| Setup drifts after a few hundred miles | Hardware seated, bolts loosened | Re-torque, re-measure |
| Sways even with correct fender heights | Tongue weight under 10 percent | Tongue weight guide |
Stop and fix this before you tow if: you are under the trailer, or reaching under the A-frame, with the tongue held only by the tongue jack (use rated jack stands under the frame, wheels chocked); you don't have a torque wrench that reaches the ball-nut spec and are planning to guess with a breaker bar (a loose ball nut is how balls come off); the receiver sticker's weight-distributing tongue weight is below your measured tongue weight; or your truck's manual prohibits a weight-distribution hitch on that vehicle. A spring bar under tension stores real energy. Jack the coupler up to unload the bars before you release a bracket, and keep your face out of the lever's swing.
Parts and tools mentioned
- Equal-i-zer 4-Point Sway Control hitch
- Blue Ox SwayPro
- Reese or Husky round-bar weight distribution hitch with friction sway control bar
- Andersen No-Sway Weight Distribution hitch
- Tape measure, 4 ft level, wheel chocks, rated jack stands
- 3/4 in drive torque wrench or torque multiplier for the ball nut and head bolts
- Owner’s manual towing section for the truck, for the front axle restoration target
Questions people ask next
Should I measure with the trailer loaded or empty? Loaded the way you tow, including water if you travel with water. The bars are tuned to the tongue weight on the day you measured; a 300 lb change in tongue weight will move the front fender noticeably.
Why does my truck manual say 50 percent when the hitch manual says 100? The truck maker tested its frame, rear axle, and steering with a specific amount of load returned to the front. When the two disagree, the truck manual wins.
Can I use a weight-distribution hitch with a surge-brake trailer or a unibody SUV? Surge brakes often conflict with the bar geometry; check the coupler manufacturer. Many unibody SUVs prohibit weight distribution because the receiver mounts to sheet metal, not a frame. The towing section of the vehicle manual is the authority.
How often should I re-check the fender heights? After the first 50 miles, then whenever the load changes, you swap trucks or tires, or the truck gets a lift or leveling kit.
Photos
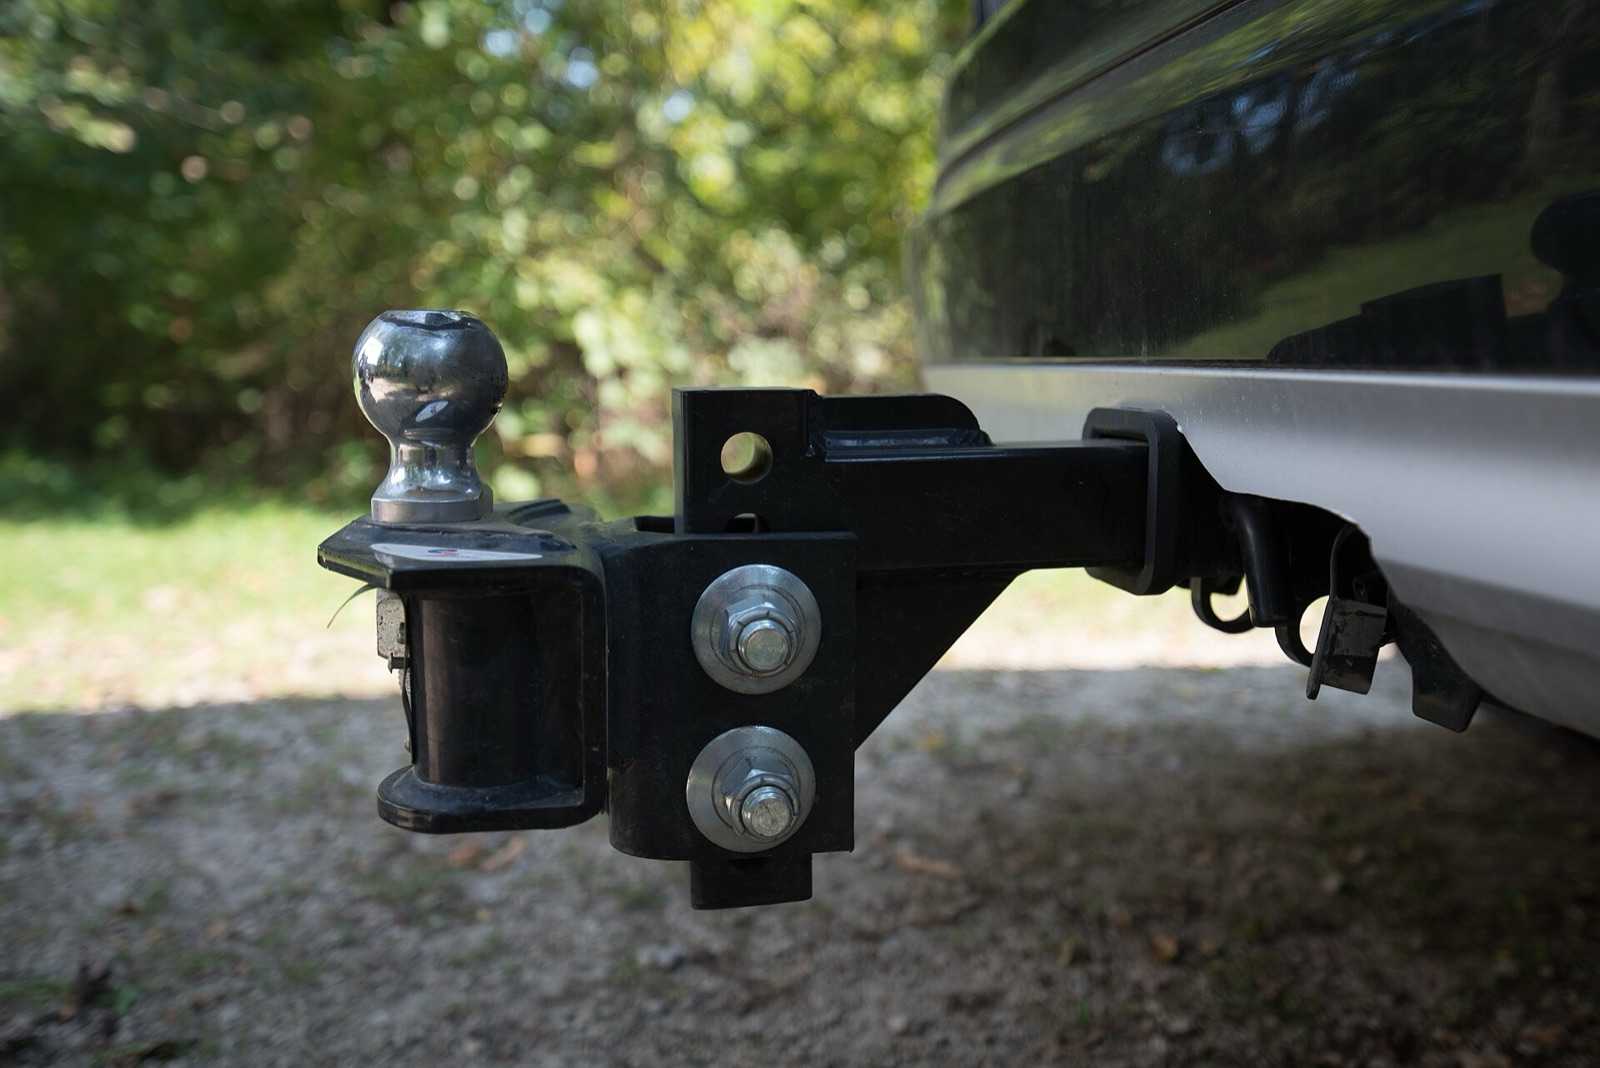

Manuals and references consulted
- Equal-i-zer 4-Point Sway Control Hitch owner's manual and installation instructions
- Blue Ox SwayPro installation and operation manual
- Andersen Hitches No-Sway Weight Distribution Hitch instructions
- Reese and Husky round-bar weight distribution hitch installation instructions
- Ford, GM, and Ram owner's manual towing sections (front axle restoration guidance)
- SAE J684 Trailer Couplings, Hitches, and Safety Chains