How to Dewinterize an RV and Sanitize the Fresh Tank (With the Bleach Ratio)

Dewinterizing order of work
- Inspect exterior Winter seal damage
- Anode in, bypass normal Dry heater, wet ground
- Drains closed, pressurize Flashlight on fittings Split line, open drain
- Flush antifreeze Every fixture, hot/cold Pink hot side: bypass
- Sanitize fresh tank 1/4 cup per 15 gal Short soak, musty water
- Fill heater, then light Steady hot stream ECO trip, burned element
- Battery, propane, tires Leak, low charge
Winterizing antifreeze calculator
Your fixtures, and whether you blow the lines out first; get the gallons to buy and the bleach to sanitize.
Open the calculator →Watch it done
Videos are from the channels named, not Chock & Level. Where a video and your manual disagree, follow the manual. Playing a video loads YouTube, which sets its own cookies.
The trailer sat all winter with pink antifreeze in the lines, the water heater bypassed, the anode rod taped inside the heater door, and the battery on a maintainer in the garage. Dewinterizing is undoing that in the right order, then sanitizing the fresh water system, then checking everything that could have failed while it sat.
The order matters for two reasons. If you pressurize before you’ve closed the drains and reinstalled the anode, the water ends up on the ground. If you turn on the water heater before it is full, the electric element burns out in seconds. Everything else is a checklist.
Plan on an afternoon of work plus a soak of 4 to 12 hours for the bleach. You need the water heater anode or plug, Teflon tape, a jug of plain household bleach, a measuring cup, a flashlight, a spray bottle with soapy water, a tire gauge, and a torque wrench.
Quick answer. Reinstall the water heater anode (Suburban) or drain plug (Atwood/Dometic) with Teflon tape and return the bypass valves to normal. Close the low-point drains and faucets, reinstall the water filter cartridge, and look under every sink and panel for a split line while you pressurize. Flush antifreeze from every fixture, hot and cold, until clear. Then sanitize: 1/4 cup of 5 to 6 percent household bleach per 15 gal of fresh tank capacity, diluted in a gallon of water and poured into the tank, tank filled full, every fixture run until you smell chlorine, 4 to 12 hours of soak, drain, refill, flush until the odor is gone. Fill the water heater (steady stream from a hot faucet) before you turn it on.
What winterizing left behind
If you followed the winterizing guide, the system is in this state: fresh tank drained and the drain possibly open, water heater drained with the anode or plug out, bypass valves set so the heater is out of the circuit, low-point drains closed, pump winterizing valve possibly still turned to the siphon hose, antifreeze in every line and P-trap, filter housing empty, battery disconnected or removed, propane cylinders closed.
Step 1Inspect the exterior before you open anything
Walk the roof seams, the front and rear cap joints, every vent and the AC shroud, the window frames, and the sidewall trim. Winter does its damage with ice: lap sealant that was cracked in the fall is split now. Press the ceiling inside at every corner and around each vent. Soft means water has been getting in all winter, and that comes before plumbing; see finding a water leak.
Step 2Reinstall the water heater anode or plug and reset the bypass
Suburban (SW6DE, SW10DE, and similar). The anode rod is the drain plug. Inspect it: if more than about half the magnesium is gone or it is down to the steel core wire, replace it (Suburban 232767). Wrap the threads with three or four turns of Teflon tape, thread it in by hand, then snug it with a 1-1/16 in socket. Don’t overtighten; the tank threads are steel in an enameled tank and a cross-thread is a tank.
Atwood and Dometic (GC6AA, GC10A). Reinstall the 1/2 in NPT nylon plug (Atwood 91857) with Teflon tape, hand tight plus a quarter turn. It is plastic and strips before the tank does. The tank is aluminum and has no anode.
Bypass valves. Return them to the summer positions. On a three-valve bypass: cold inlet open, hot outlet open, bypass closed. On a two-valve: cold open, bypass closed. On a single-valve body: handle to NORMAL per the label. A bypass left set is the most common dewinterizing mistake. The faucets flow, the heater stays dry, and the first time it is lit the ECO trips; the electric element burns out in seconds with no water around it.
Step 3Close the drains, reinstall the filter, return the pump valve
Under the trailer, close both low-point drain caps or petcocks and the fresh tank drain. Inside, close every faucet you opened in the fall, including the outside shower valves.
Put a new cartridge in the water filter housing, if the trailer has one, and reinstall the housing hand-tight with its O-ring seated.
Turn the pump winterizing valve back to the tank position. If the pump runs and runs without building pressure in step 5, this valve is the first thing to check.
Step 4Fill the tank partway and look before you pressurize
Put 10 to 15 gal in the fresh tank. Before turning on the pump, open the cabinets under every sink, pull the panel behind the shower valve, open the water heater exterior door, and have a flashlight ready. Then turn the pump on and listen. It should run 10 to 30 seconds and shut off.
A pump that won’t shut off means water is going somewhere: a faucet left open, a drain still open, the pump valve, or a split line. Walk the fittings with the flashlight. A freeze split in PEX is a hairline along the tube; a cracked fitting sprays at the crimp ring; a cracked pump head drips from the housing seams. Shut the pump off at the first sign of water and fix it before going on.
Step 5Flush the antifreeze from every fixture
Run each fixture until the pink is gone and the water runs clear and tastes clean. Farthest fixture first, hot then cold:
- Kitchen faucet, hot then cold.
- Bathroom faucet, hot then cold.
- Shower, including the hose and head.
- Toilet. Hold the flush until the bowl water runs clear.
- Outside shower, both valves, with the head’s trigger held.
- Washer hookups and ice maker line, if present. Reconnect the ice maker line only after the cold side runs clear; refrigerator makers say no antifreeze through the solenoid.
Step 6Sanitize the fresh tank and lines
The sanitizing concentration RV and tank manufacturers use is 1/4 cup of household bleach (5 to 6 percent sodium hypochlorite) per 15 gal of fresh tank capacity, which works out to roughly 50 ppm of chlorine in the tank. Use plain bleach, not scented, splashless, or gel; those have additives you don’t want in a drinking system.
| Fresh tank | Bleach |
|---|---|
| 30 gal | 1/2 cup |
| 45 gal | 3/4 cup |
| 60 gal | 1 cup |
| 75 gal | 1-1/4 cup |
| 100 gal | 1-2/3 cup |
Round up for a tank in between. The winterizing antifreeze calculator does the arithmetic for odd tank sizes.
Never pour bleach straight into the tank or the gravity fill. Mix it into a gallon of water first, then pour the mix into the tank with a funnel or through the gravity fill. Fill the tank completely with fresh water.
Turn the pump on and open every fixture, hot and cold, one at a time, until you smell chlorine at each: both faucets, shower, toilet, outside shower, washer bibs. Top off the tank. Then let it sit 4 to 12 hours. Overnight is the usual answer. Bleach needs contact time; running it through and dumping it immediately sanitizes very little.
Drain the tank completely through the tank drain, and run the pump to drain the lines through the low-point drains. Refill with fresh water, run every fixture until the chlorine smell is gone, and drain again. Two flush cycles is typical; three if you still smell it. A little remaining chlorine is harmless but tastes like a pool.
The water heater gets filled only after the sanitizing is done. Bleach sitting in a steel tank with a magnesium anode for 12 hours is hard on both, and a chlorinated heater takes longer to flush than the rest of the system.
Step 7Fill the water heater and check it under pressure
With the bypass in the normal position and the tank partly full of fresh water, open a hot faucet inside and run the pump. Air will spit and gurgle for a minute while the 6 or 10 gal tank fills. When the hot faucet runs a steady stream with no air, the tank is full and the air is burped. Close the faucet.
Open the water heater exterior door and look at the anode or plug and the P&T relief valve while the system is under pressure. A damp anode fitting needs another quarter turn or more tape. A P&T valve that drips after sitting all winter sometimes reseats if you lift the lever and let it snap back; one that keeps dripping is a replacement.
Only now switch on the water heater, gas first. If it lights and shuts down within minutes, the ECO has tripped from a dry tank: see water heater won’t light on gas. Switch on the electric element only after the gas side has confirmed the tank is full and heating.
Step 8Battery, converter, and 12 V
Reinstall the battery if it wintered indoors, or reconnect the negative cable. A flooded battery that sat on a maintainer should read 12.6 V or higher at rest; one that sat disconnected and unmaintained for five months is likely at 12.0 to 12.3 V and wants a full charge before the first trip. Below 11.8 V after a winter, load test it before relying on it (see how to test a deep cycle battery).
Plug into shore power and confirm the converter is charging: 13.2 to 13.6 V at the battery terminals with the converter running. Then test every 12 V circuit: lights, fans, pump, slide, jacks, awning.
Step 9Propane leak check and appliance checks
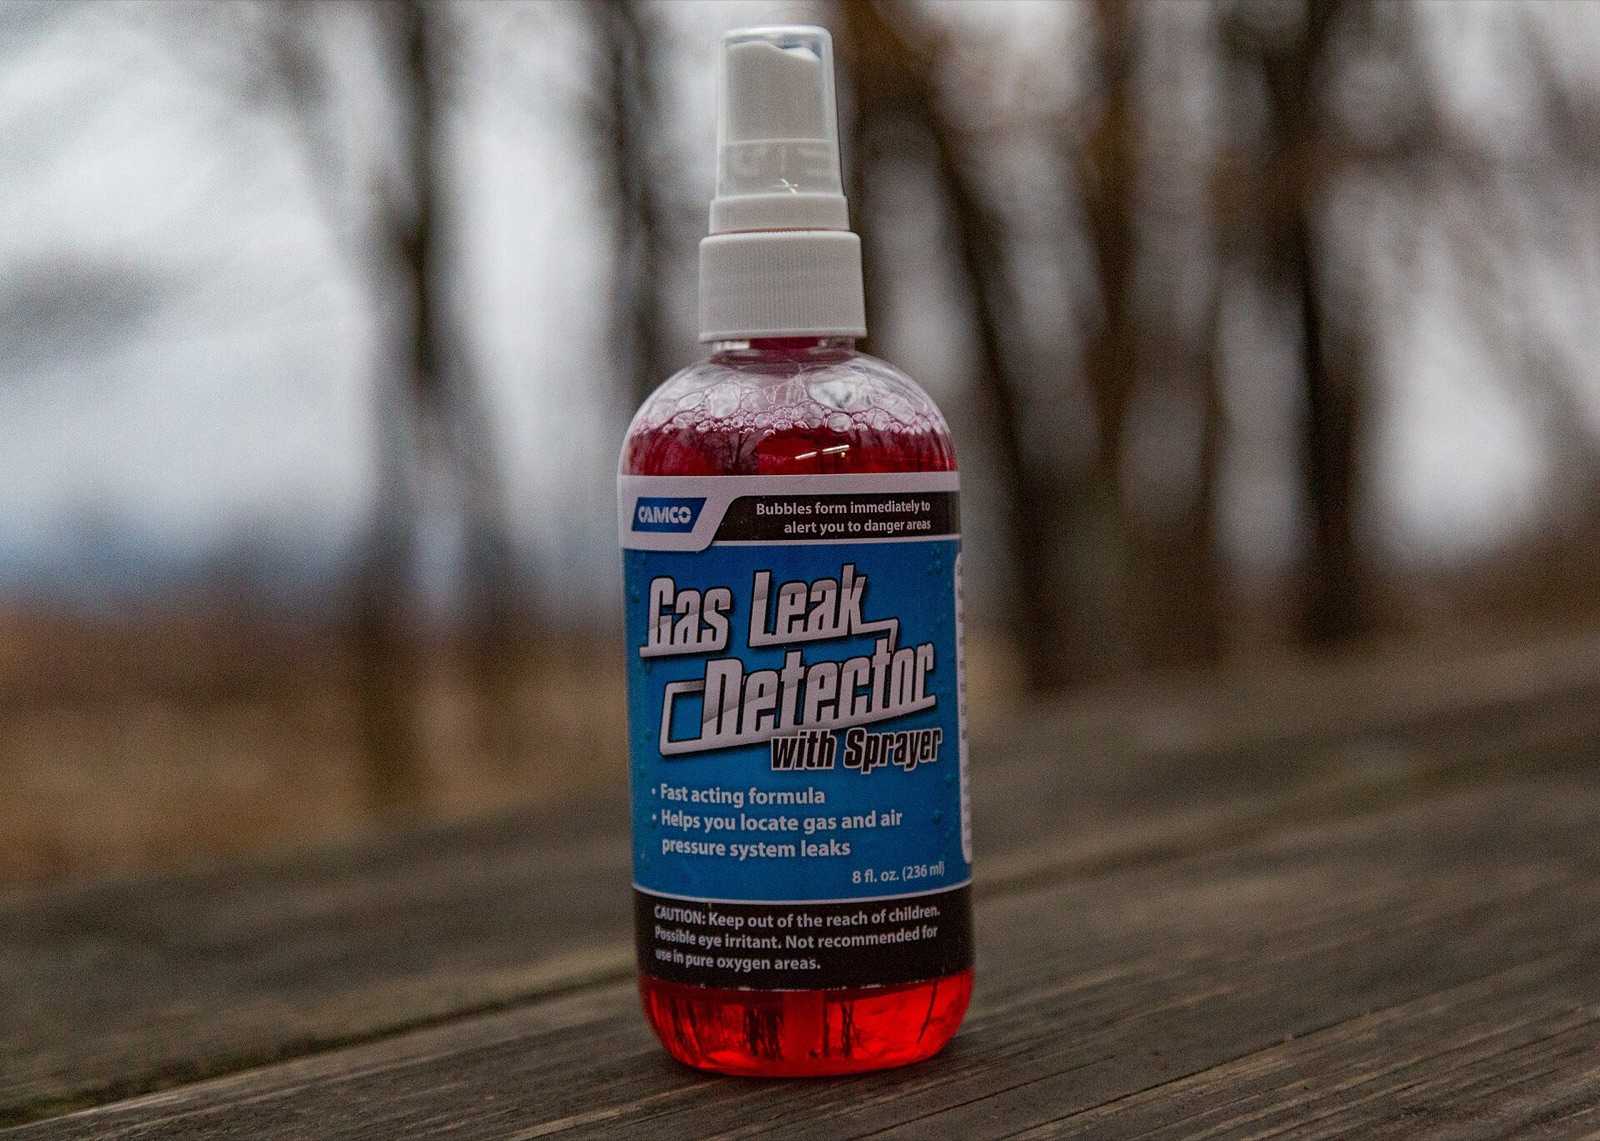
Open the cylinder valves slowly. With all appliances off, spray a soapy water solution (a squirt of dish soap in a spray bottle) on every connection you can reach: pigtails at the cylinders, the regulator inlets and outlet, the changeover, and the hose fittings behind the water heater, furnace, fridge, and stove where accessible. Bubbles that grow are a leak. Tighten and retest; a leak that won’t stop is a stop-and-call-a-tech item. Look at the regulator vent too: it should be clear, with its cover intact and the vent pointing down.
Light a stove burner first to purge air from the line; it may take a few tries. Then run each appliance on each source:
- Refrigerator. On 120 V for an hour, then on propane for an hour, with a thermometer inside. Both should cool. See fridge not working on propane if the gas side fails.
- Water heater. Gas, then electric, as in step 7.
- Furnace. Set the thermostat 10 °F above room and let it run a full cycle. Mud dauber nests in the exhaust tube over winter cause weak ignition.
- Air conditioner. On shore power, cooling mode, 15 minutes. Listen for the compressor and check for cold air at the vents.
Step 10Tires, lugs, and hitch
Tire pressure drops roughly 1 psi per 10 °F of temperature drop, plus slow leakage over months. Inflate cold to the pressure on the tire placard (or the sidewall maximum for ST tires, which is what most trailer makers specify). Inspect the sidewalls for cracking, and check the date code; many tire makers advise replacing trailer tires at 5 to 7 years regardless of tread.
Torque the lug nuts to the value on the wheel manufacturer’s label or in the manual. Typical figures for trailer wheels are 90 to 120 ft-lb for 1/2 in studs and higher for 9/16 and 5/8 in studs, but use your wheel’s number. Check them again after the first 50 miles.
Printable checklist
- Exterior: roof seams, caps, vents, windows, trim inspected; ceiling corners pressed
- Underbelly, wiring, and compartments checked for rodent damage
- Water heater anode (Suburban) or plug (Atwood) inspected, Teflon taped, installed
- Bypass valves to normal: cold open, hot open, bypass closed
- Low-point drains and fresh tank drain closed; all faucets and outside shower closed
- Water filter cartridge installed, housing tight
- Pump winterizing valve back to tank
- 10-15 gal in fresh tank; pump on; every fitting checked by flashlight under pressure
- Antifreeze flushed from every fixture hot and cold, toilet, outside shower; gray tank dumped
- Sanitize: 1/4 cup bleach per 15 gal, premixed; tank filled; every fixture run until chlorine smell; 4-12 hour soak
- Drain, refill, flush until no odor; repeat as needed
- Water heater filled: steady stream from hot faucet, no air; fittings and P&T checked under pressure
- Water heater lit on gas and confirmed heating; then electric
- Battery installed, charged, converter output 13.2-13.6 V confirmed
- Propane/CO detector tested; expiration date checked
- Propane valves opened slowly; soap test at every connection; regulator vent clear
- Fridge on 120 V and on gas; furnace full cycle; AC 15 minutes; range and oven
- Tires inflated cold to placard; sidewalls and date codes checked
- Lug nuts torqued to spec; recheck at 50 miles
- Coupler, chains, breakaway switch tested, 7-pin plug inspected
Symptom → likely cause
| What you see | Most likely | Check |
|---|---|---|
| Pump runs and runs, never shuts off | Open faucet or drain, pump valve on siphon, split line | Low-point drains, pump valve, flashlight on fittings |
| Hot side stays pink after several gallons | Bypass still set | Bypass valve positions |
| Water heater lights, shuts down in minutes | Dry tank, ECO tripped | Bypass; fill until hot faucet runs steady |
| Chlorine smell won’t go away after two flushes | Bleach not fully drained from tank | Drain tank fully, including the low spot, before refilling |
| Water tastes or smells musty after sanitizing | Short contact time, or filter cartridge not replaced | Repeat with a 12-hour soak; new cartridge |
Stop if: you have not confirmed the water heater is full with a steady, air-free stream from a hot faucet; do not switch on the electric element until you have, because it burns out in seconds dry. Handle bleach with gloves and eye protection, never mix it with anything but water,. If the soap test shows a propane leak you can't stop by tightening a fitting, close the cylinder valves and call a certified RV technician. If you find a soft floor or a wet ceiling in step 1, the leak comes before everything else on this list.
Parts and tools mentioned
- Suburban anode rod 232767 and 1-1/16 in socket; Atwood 1/2 in NPT nylon drain plug 91857
- Teflon tape
- Plain household bleach, 5 to 6 percent sodium hypochlorite; measuring cup; funnel
- Water filter cartridge for your housing
- SharkBite or crimp PEX couplings for freeze splits
- Spray bottle with dish soap solution for the propane leak test
- Tire gauge, torque wrench, multimeter
- Winterizing antifreeze calculator for the bleach arithmetic
Questions people ask next
Can I use more bleach to make it faster? More bleach doesn’t shorten the contact time much and it is harder on the pump seals, the heater anode, and the taste. The 1/4 cup per 15 gal figure is what tank and RV manufacturers publish; give it the hours instead.
I forgot the bypass and the heater ran dry on electric. Is it ruined? The element is. The tank is usually fine. Replace the element, fill the tank, and burp the air before trying again. On gas, the ECO protects the tank and usually resets once the tank is full and cool.
Photos


Manuals and references consulted
- Suburban SW-Series water heater owner's manual (anode rod, filling before operation)
- Atwood/Dometic GC6AA and GC10A water heater service manual (drain plug, bypass)
- Shurflo 4008 pump installation and operation guide
- Camco and Valterra fresh water tank sanitizing instructions (1/4 cup per 15 gal)
- Travel trailer manufacturers' owner's manuals, spring preparation and sanitizing sections (Forest River, Jayco, Grand Design)
- Propane leak test guidance from RV manufacturer owner's manuals and NFPA 1192
- Tire and wheel manufacturers' lug torque and cold inflation guidance (Lionshead, Dexter)